fountains and flamingos
Remember our side yard? Back in December, we shared our DIY landscaping plan and initial work. Then the rain came. And stayed. Good for California. Bad for landscaping progress. Since then, a few false-starts, and plenty of tweaking. And now, finally, we’re done. And it feels good.
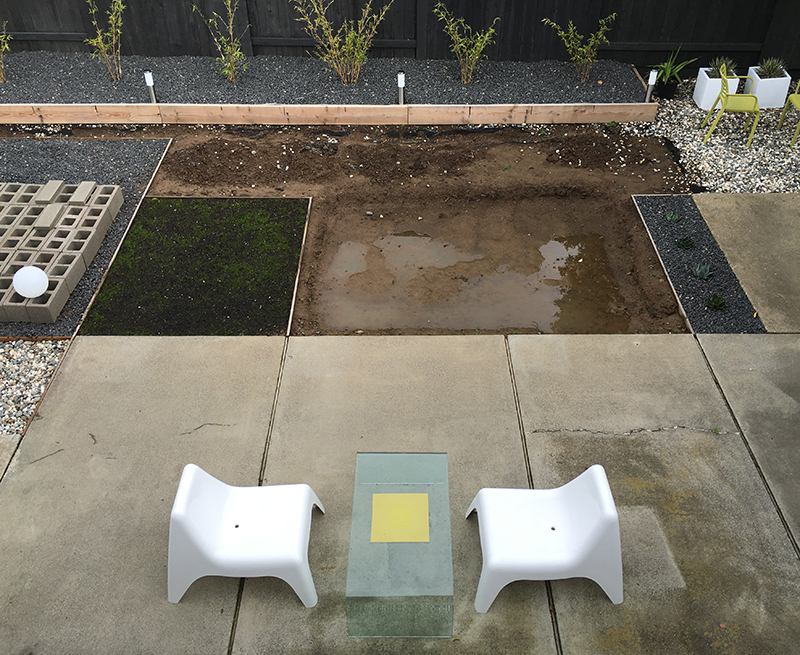
Just a side note (pun intended) –we’d like a more flattering term than “side yard”, but that’s technically correct, due to our home’s orientation. Our back yard is a whole other story. For now, let’s recall what it looked like last winter. Yep, a muddy mess.
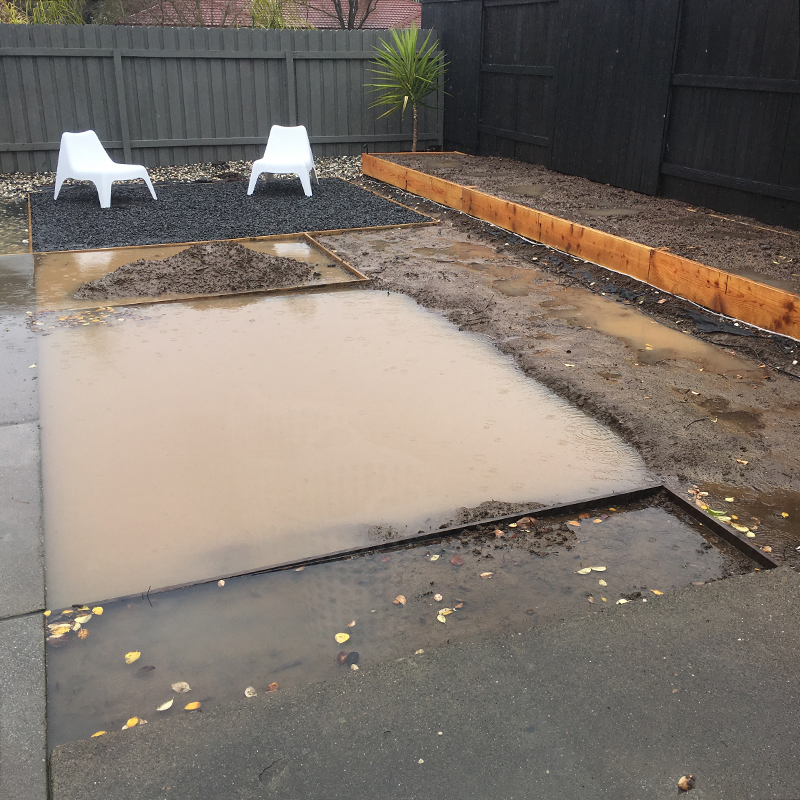
We planned on making that large hole a reflecting pool (more on that later) and the rain gave us preview. On a weather break (late Feb) we seeded the adjacent rectangle, with Prairie Nursery’s no-mow lawn seed mix –a blend of six fescues, requiring low water and (predictably) no mowing.
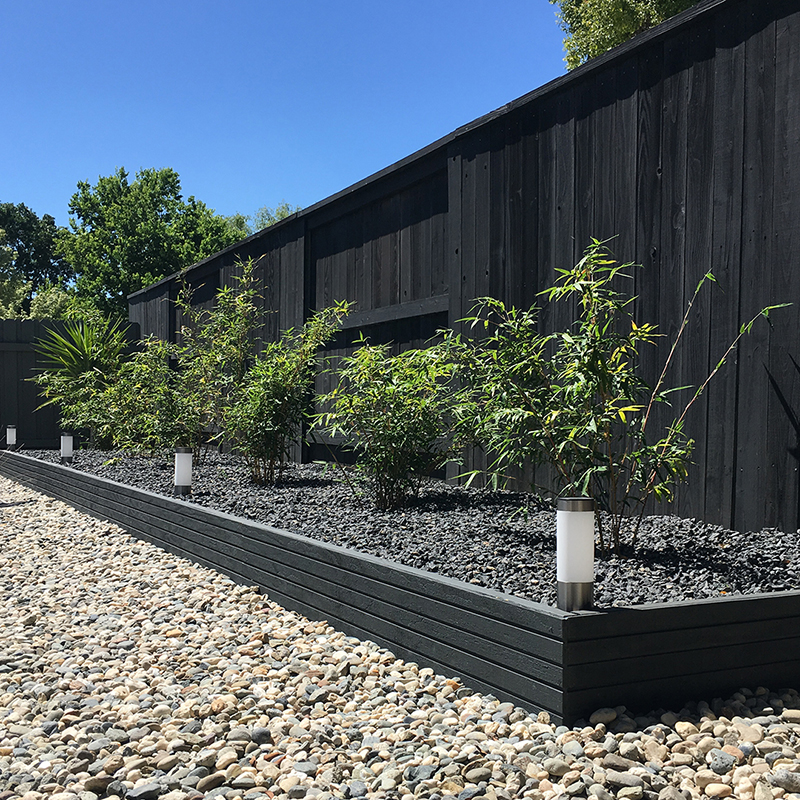
We planted ‘Alphonse Karr’ in the raised planter we built –a non-invasive clumping bamboo. We used six good-sized specimens for this 30-foot stretch. It should fill-in nicely over the next couple years. We’ve already noticed some good growth (see later pics) so it’s happy here.
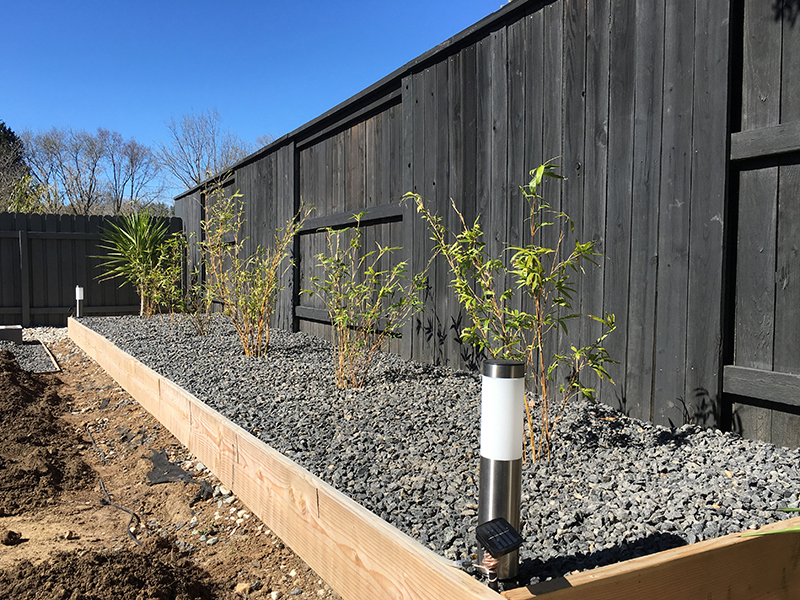
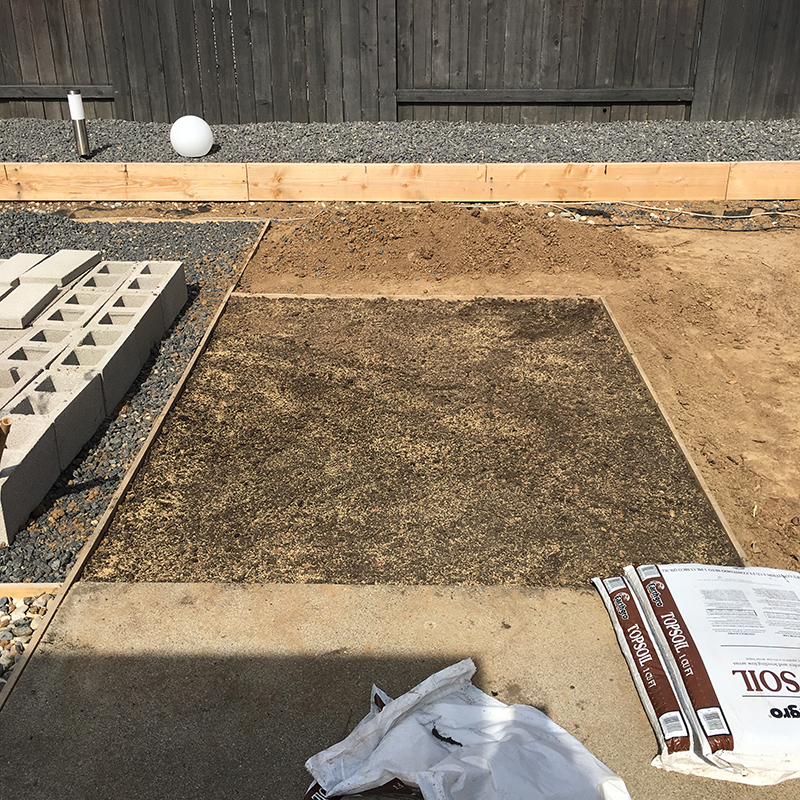
The rain kept coming. Good for the bamboo and no-mow (see the green shoots coming through). You can also see the mountain agave we planted in the right-hand cutout. Oh, and that cinder-block is just passing through –a donation from our friend, Andy…which we’re yet to find a use for.
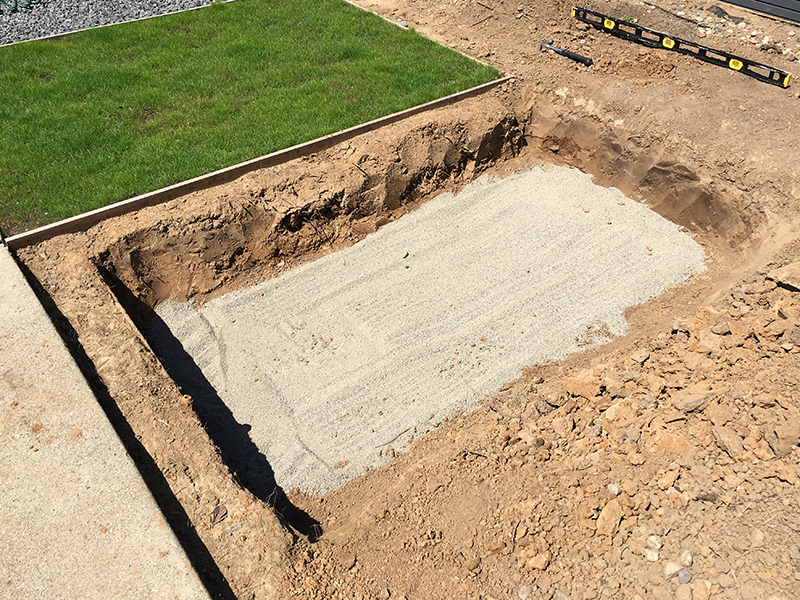
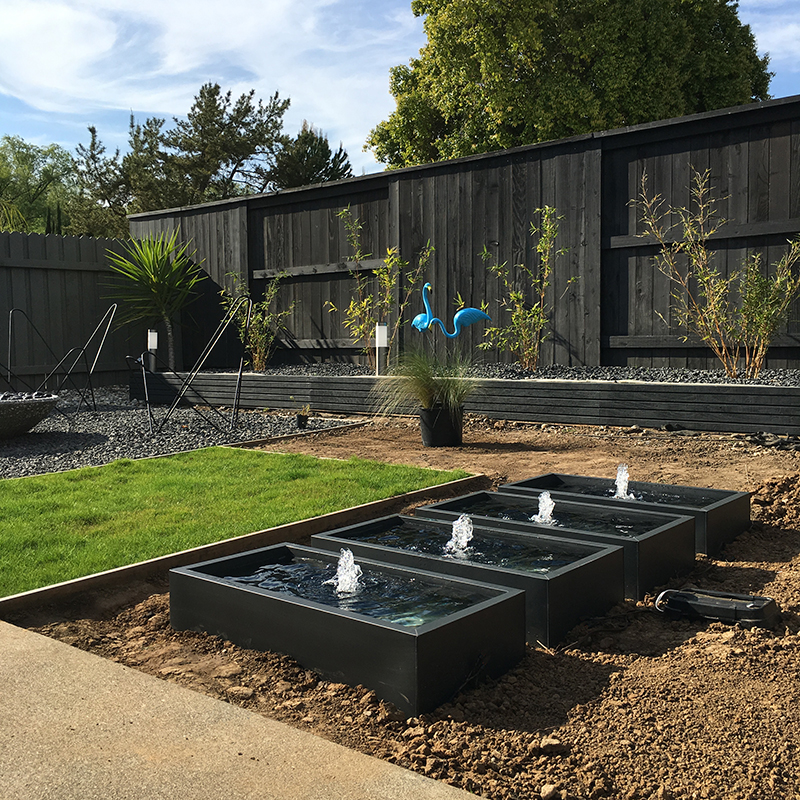
A little later (see the no-mow filling-in nicely) we got back to work. We explored the reflecting pool idea, but it just wasn’t happening. We figured fountains would still give us the water we craved, so developed a plan. First, we dug a big hole and filled with sand.
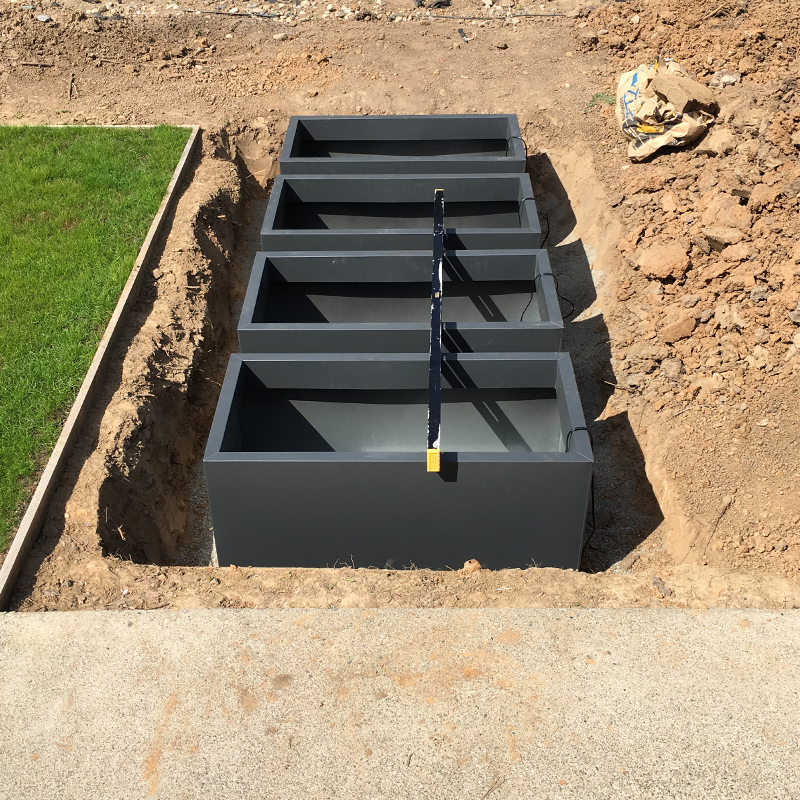
Next, we placed, spaced and leveled four galvanized charcoal planters from CB2 –not designed to hold water, so they need waterproofing. We fed the fountain pumps through existing drainage holes, and siliconed in place, along with all the seams. We filled with water and all looked good.
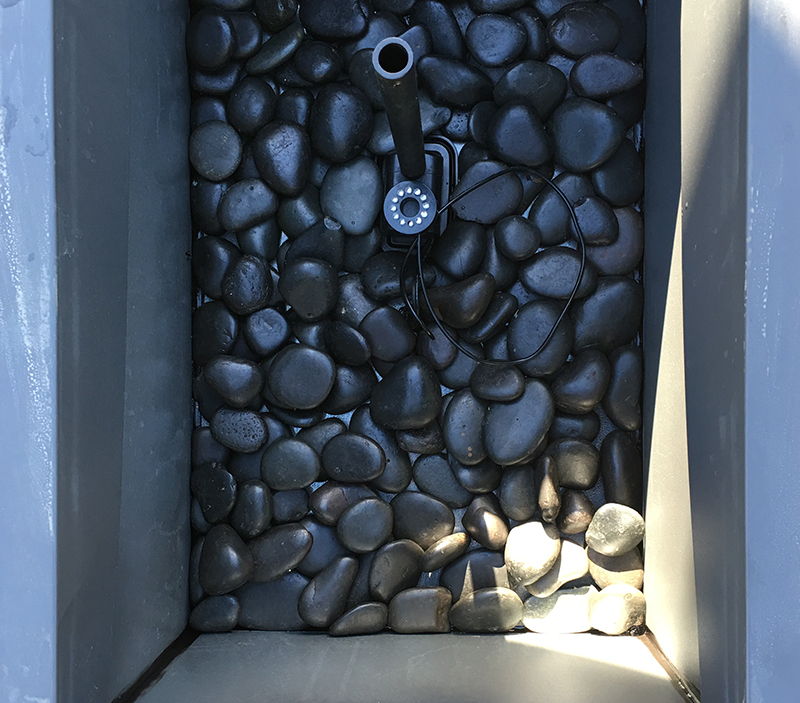
These fountain pumps have LED lights –not on our wish list, but we’ll go with it. Actually looks pretty cool at night. In the bottom, we placed some dark pebbles –can’t recall the name. Just what appealed at Home Depot. We’ve added a little more since this, to close all the gaps.
We ran electrical from a nearby outdoor source –thankfully, most of the route was partially dug-up, so this was simple. We used a weatherproof connection box, which will be buried in rock. You’ll notice butterfly chair frames on the left, which I’ll get to. Also, that the rear planter is now clad.
This wasn’t our original plan, but we had a few sheets of spare Eichler siding in the garage –this was locally milled stuff, that we bought from our neighbor, Dane. Turned out to be a couple inches shorter than our lowest siding wall, so we couldn’t use it. Until now.
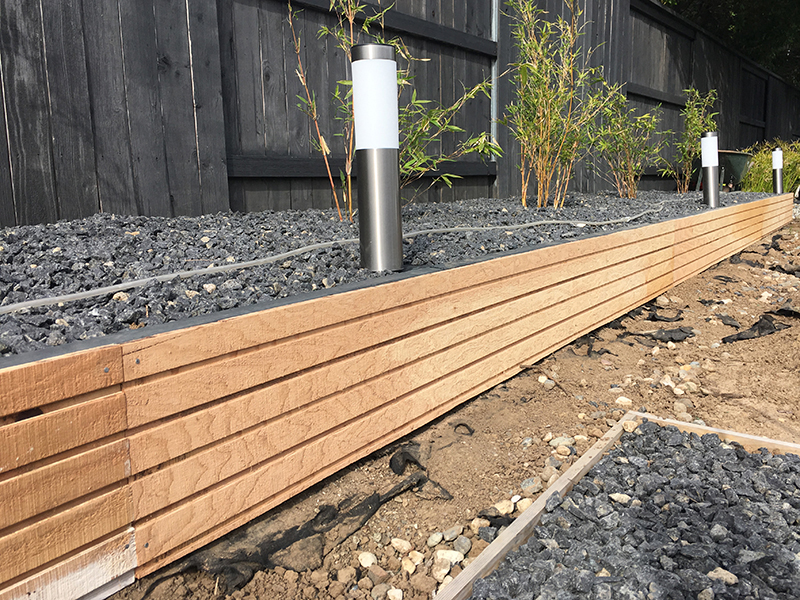
We cut the siding into strips with a circular saw, nailed into place, caulked, then painted in our dark gray beam color. We were so happy how this came out. Our neighbors picked up the solar lights from Costco for us (thanks K+G!) –we partially buried them, for a more discreet look.
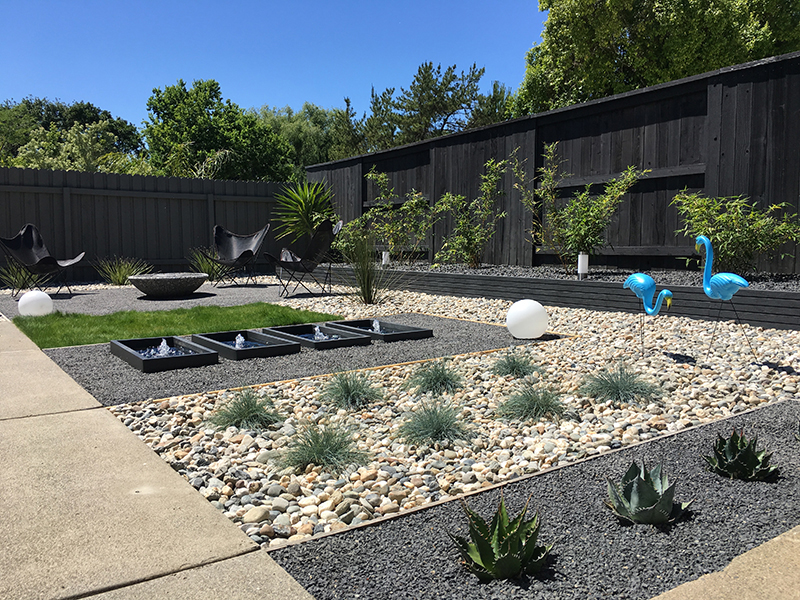
Let’s go on a little tour. First-up, four mountain agave, followed by eight blue fescue. We had planned to buy standard pink flamingos and spray them black, but we spotted these and fell in love. We did spray the legs black though. We have three solar globes dotted around.
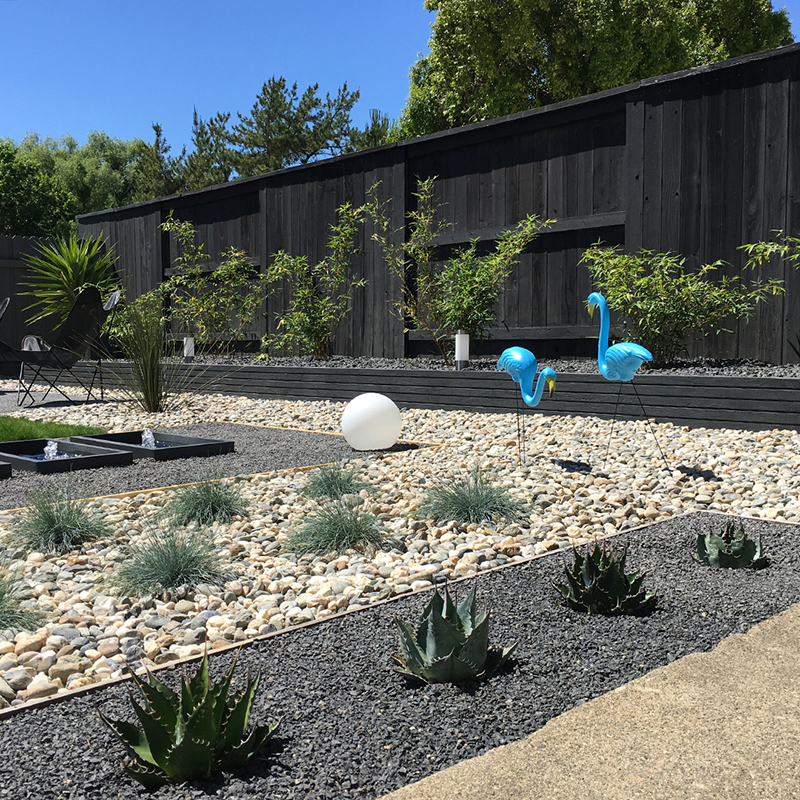
There’s another, by the golden barrel cactus. We switched to 1/4″ rock for all the cutouts, and the fountain area. We did have salt and pepper next to the fountains, but we thought this would look cleaner. You can tell this was a tweak as the surrounding wood hasn’t aged yet.
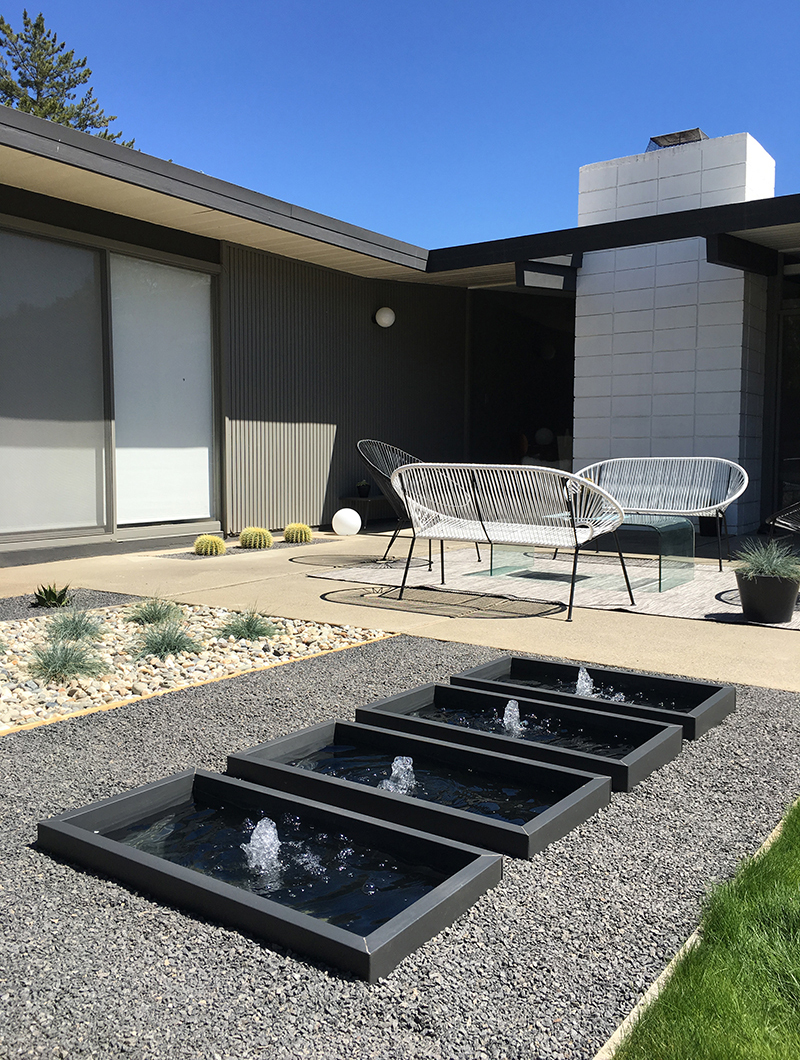
Next to the fountains, our Dasylirion Longissimum (try saying that when you’ve had a few) –we transplanted this from the front yard. Beneath that, our no-mow grass, which is doing so well. A couple of patches need to fill in, but nothing major.
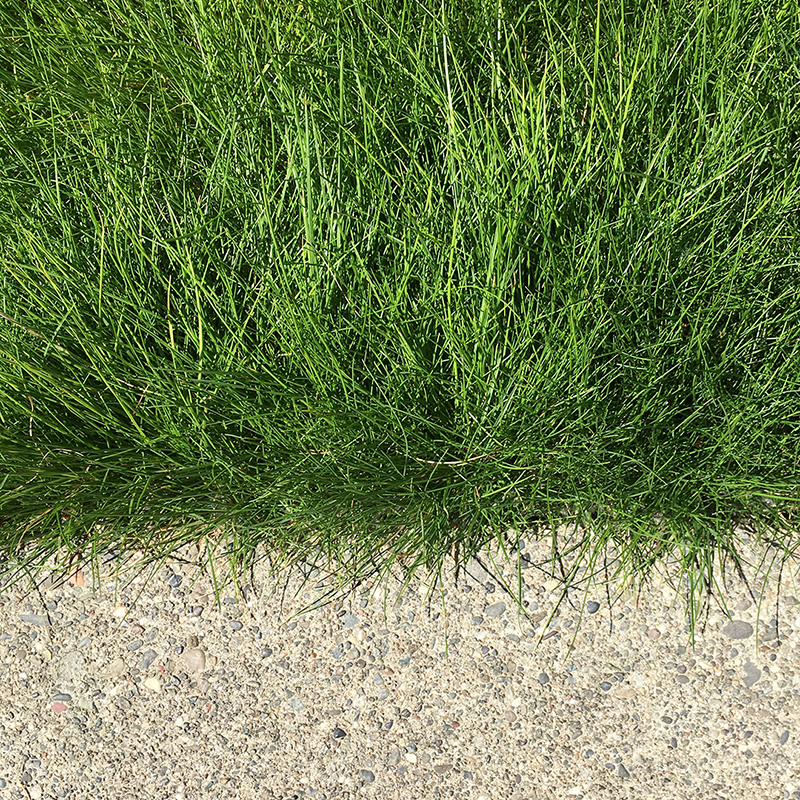
Close-up, you can see it’s pretty much weed-free –a novelty for us. The fescue is very fine, and soft underfoot. Best of all, it provides a nice burst of vibrant green, to balance our monochrome palette. We seeded a much larger area at the back too, which I’ll share one of these days.
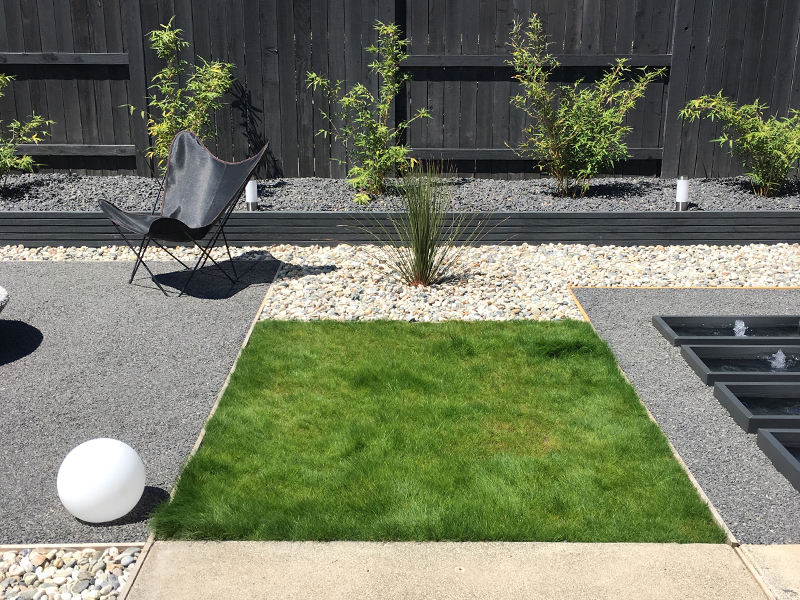
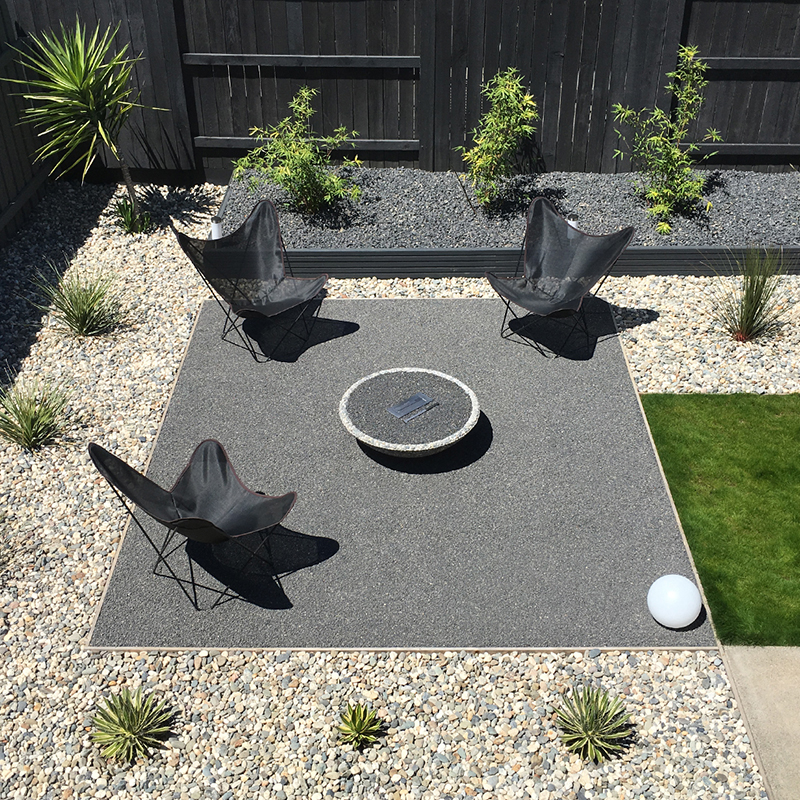
Next to that, our firepit patio. We originally ordered white butterfly chair covers, but when they arrived they had beige edging! So we switched to black. We planted alternate agaves in the front row –the smaller are quadricolor century plants and (embarrassingly) I have no idea what the others are called.
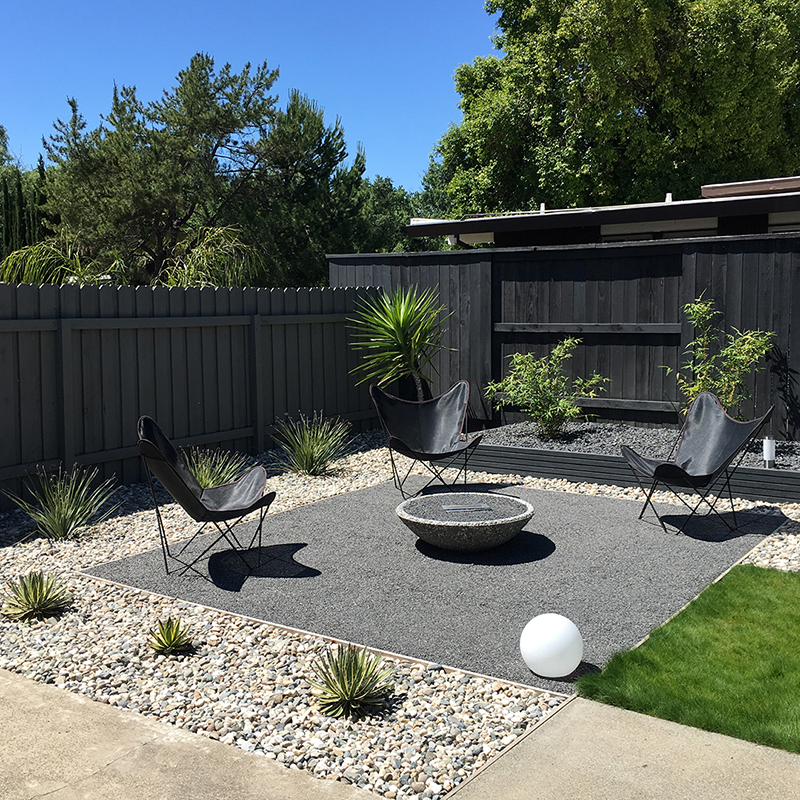
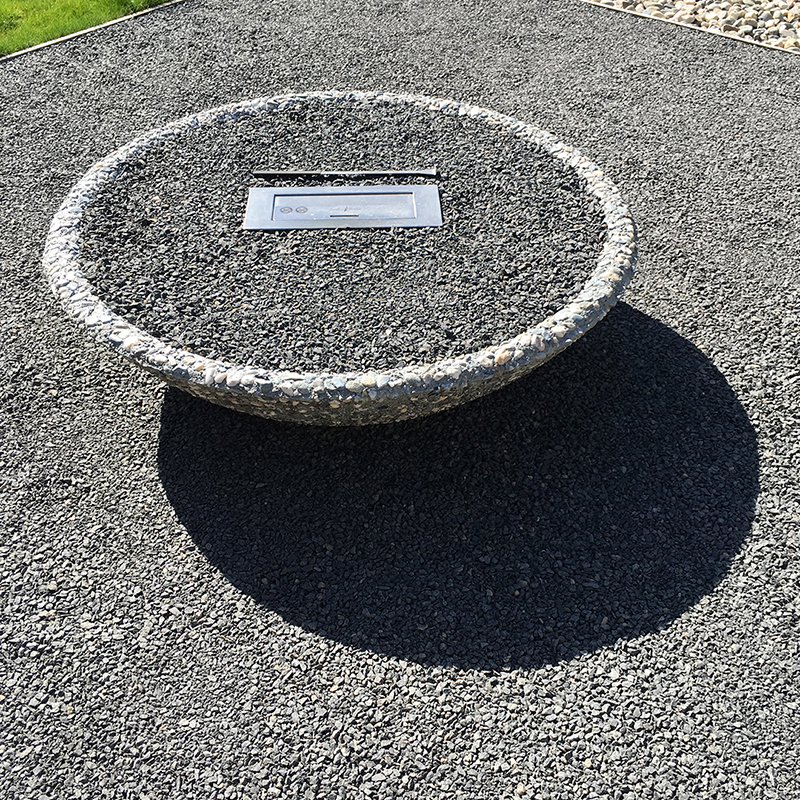
We re-purposed this aggregate fountain as a firepit (kinda) –the flames come from an ethanol-fueled insert. Doesn’t give off much heat, but looks pretty. We used the same small gray rock here, for patio and firepit –an improvement (we think) from our original choice.
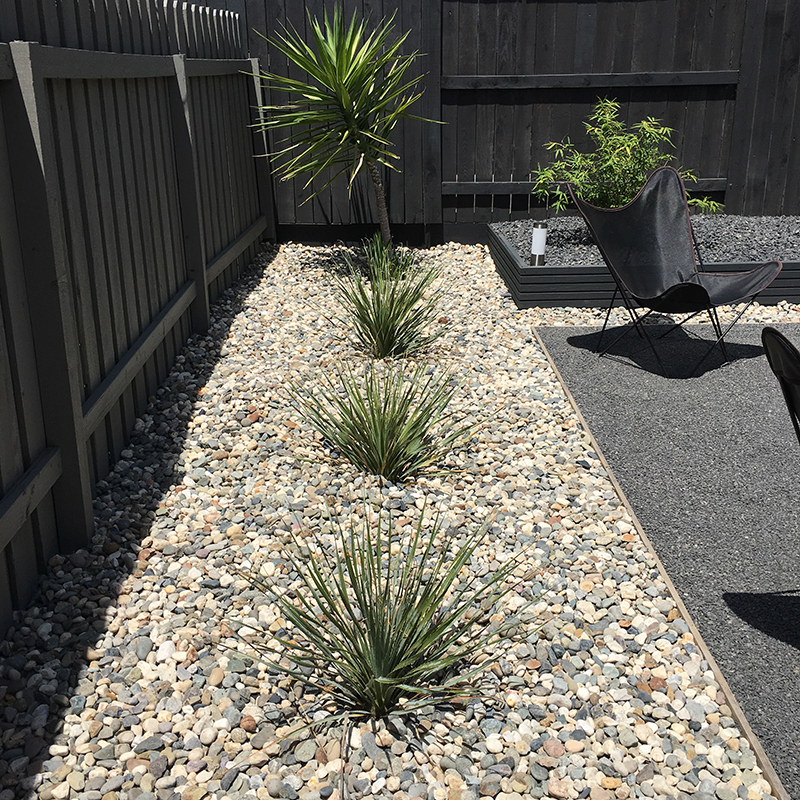
To the left, we planted three Dasylirion Wheeleri, which we adore. They’re a pain to plant though, thanks to sharp teeth, which irritated our skin like crazy. Our long-time resident yucca is doing well, with multiple pups popping-up this year.
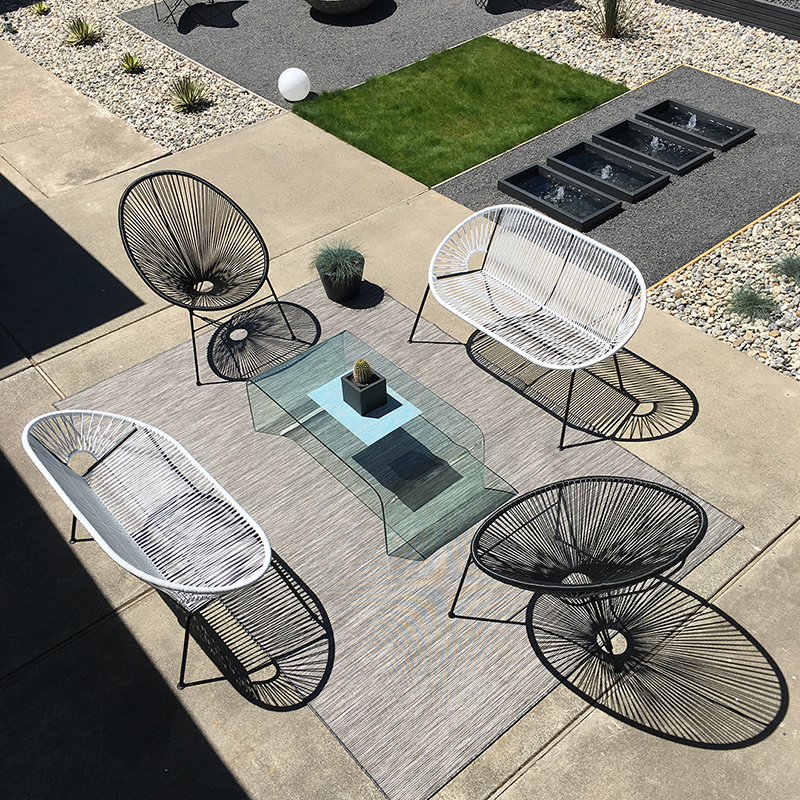
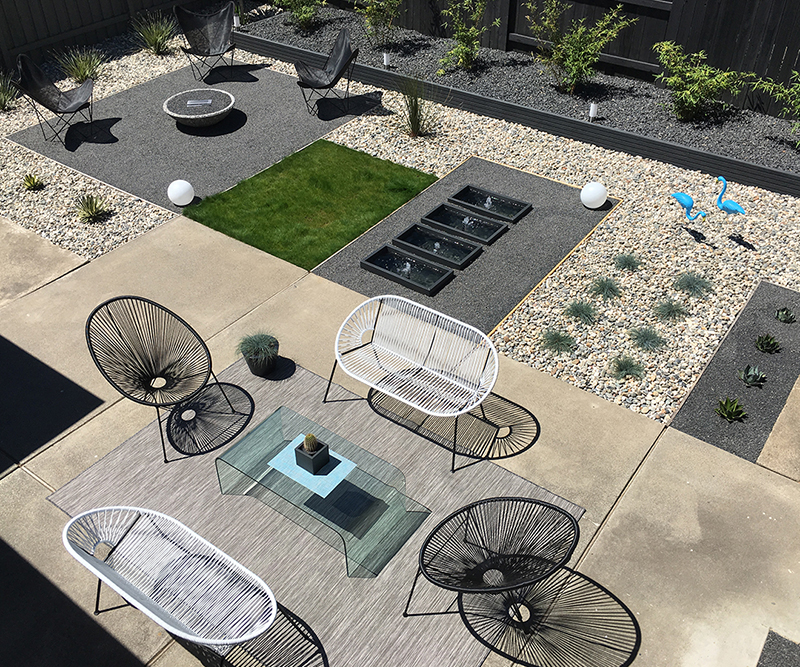
I got on the roof, for a better view. We have three seating areas –this one being our outdoor ‘living room’. The loveseats and charcoal planter are from CB2. We picked-up the Acapulco knock-offs locally. The rug is from IKEA, and the glass coffee table traveled with us from England.
This might be our favorite spot. We were super-lucky to snag these three butterfly chairs (thanks, Camila!) but could honestly do with one more. We like the visual with three, but it’s not too practical with guests –discovered this week, when I had to drag another chair over. It’s a hard life.
And here’s our outdoor dining area, shot early evening. You may recognize the setup –this used to be our main dining table. We love how it works out here, and the overhang provides some cover. We added two end chairs to our original four –all plastic, so perfect for outdoors.
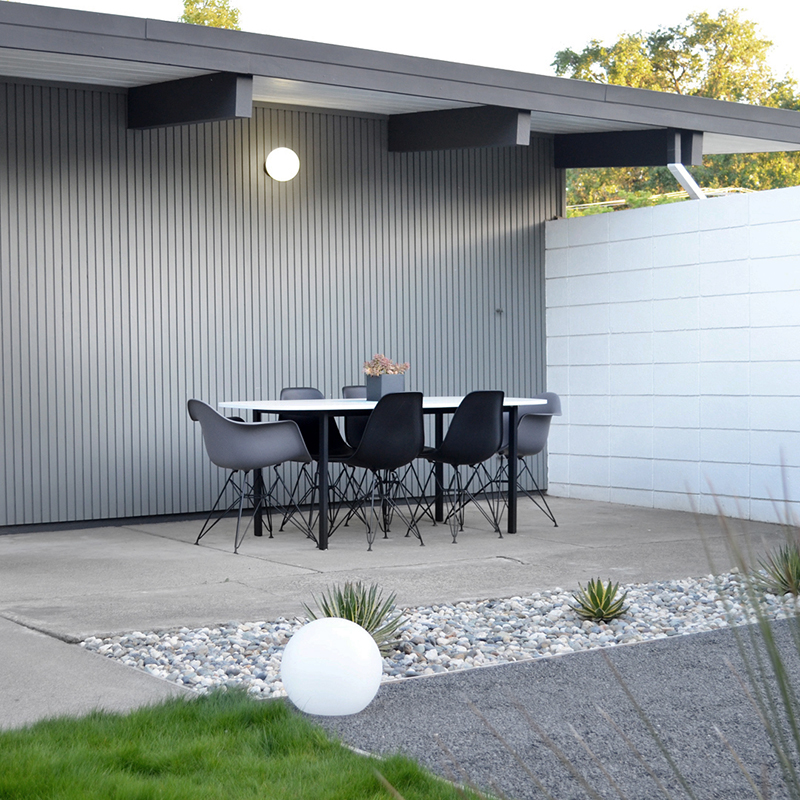
Back on the roof, here’s everything in context. We love how the rectangles extend out from the original patio slabs. It’s so new and visually interesting to us –we keeping staring at the different elements. We are proud of what we’ve created, especially being 100% DIY.
This was meant to be a temporary fix, pending a pool, but we now plan on keeping it this way. If we ever do get a pool, it will be in our back yard. And we’re pretty sure it won’t be DIY. Well, not all of it. We’re frantic with tour prep, but we’ll try to share more soon…
Beth
Awesome! Love it all – especially the flamingos!
Andy
Thank you, Beth! Yeah, they steal the show, don’t they?!
Amy Moore
Just perfect! Love it all.
Andy
Thanks Amy! So pleased you like it.
Ivy Chesser
Yay! Fabulous! Well done! Will you need to get an umbrella or some create some shade?
Andy
Thank you, Ivy! We do have a large parasol, which we move around. The house itself provides shade to the ‘living room’ area for much of the day. The queen palms, just the other side of the fence, will eventually provide some shade too. And the butterfly chairs become shaded in early evening, as the sun begins to get lower.
Jenny
Oh man, this is incredible! Perfection down to every detail and admirable adherence to your color scheme! I can’t believe this whole thing was DIYed! Did you get your chair covers from D&J? I just ordered from them and I’m not loving the beige edging…I was expecting it to be “natural” but it’s excessively tan. Hoping they’ll fade in the sun. Again, great job!!!
Andy
Thanks Jenny. Yeah, we’re suckers for a limited color palette! We did get the covers from D&J. When I called to complain/exchange, they said nobody has ever complained about the color before! I had shipping deducted before refund, as it wasn’t their fault, despite the site making no mention of tan (tan is a more accurate description). But I didn’t have time to argue. The whole thing was a bit messy, but their prices are so good. The better news for you is that those edges will surely fade. Ours have faded already, from black to brown! We will be using some sort of fabric pen, to darken them. Glad you like what we’ve done!
Jenny
I can’t believe no one’s ever complained! I’m sorry yours have faded but maybe that means I can make mine work. Thanks for the info!
Andy
Yeah, I’m calling BS on that. You should call up and complain, to see if they use that line! I think we can solve ours with a fabric pen. Fingers crossed that yours fade. Then we’ll all be happy.
tony
Hi Andy. That is amazing. Having seen the original area, way back before you started, you have made a brilliant transformation to the whole side yard. Your imagination and vision to create this “picture” is outstanding. I’m sure the tour will be very well received and that there will be many compliments on both the result, and also that it’s very much a DIY project. Very well done yet again.
Andy
Thank you, Tony! Yes, it is quite the transformation. We worried a was a little over-designed, but we love it now it’s done. I’m sure the style won’t be everyone’s cup of tea, but people should appreciate the DIY aspect. And we’re happy, so that’s the main thing!
Karolina
Loving all of it. I may have to steal your fountain DIY for some place in our yard or atrium– really clever use of the CB2 planters. And high five on the no-mow grass!
Andy
Thanks Karolina! Steal away! We doubted the fountain plan at first, but we’re very happy how it worked out. High five back –we’re no-mow buddies!
Olivia
You guys have such vision — and how wonderful you also have the skill set to make it a reality. It looks stunning — nice work!
Andy
Hey Olivia! Glad you like it. Once we had the design set, it was mostly just manual labor. Hard work, but satisfying. Thank you!
John
Looks amazing! A few thoughts, you might want to spray a clear flat acrylic finish on the metal fountain frames for added protection or even line the inside with a self-adhering waterproof membrane. Perhaps use the cinder blocks for a bench by the butterfly chairs, they could be glued, stacked and painted to match the siding color. A concrete cap could be glued on top. Perhaps additional spotlighting on the bamboo so shadows would be cast onto the fence. I could see how a larger pool for the fountain would require more work to keep clean. Perhaps use the block for a planter and/or side table to set food on by the white block wall at the dining area. Did you align the fountains up with the glass door to the house?
Andy
Thanks John! Some great suggestions. I think if we were to do the fountains again, we may use a membrane. As long as they don’t fail, we won’t change anything just yet. We have some other ideas for the cinder-blocks in our backyard (where they now are stored) but we may well add a concrete bench in this area –we’ll see. We will certainly add some extra lighting, for the bamboo and elsewhere. The fountains are within the rectangle that lines up with the sliders, though deliberately off-center. We won’t be making any changes to this area until after the tour, as we still have a healthy ‘to do’ list!
John
Are those your house pictures in the latest Atomic Ranch Magazine for the tour? The ceiling picture of the beams and globe lights and the painted siding below the window.
Andy
Yes, that’s us! Good eye, John. We haven’t seen the magazine yet, but I’m guessing they ran this promo montage. Some good coverage for the tour so far.
John
Yes looks like that I think. The magazine has a new owner, more color and additional features for buyers.
Andy
Okay, thanks. Ah yes, I saw that. Shame, as we had a good relationship with the former owners. May have to wait a little longer to get our house featured! Truthfully, there’s a lot we’d still like to do before that.
Merle Duckett
Hey Andy-
I’m in an Eichler in Thousand Oaks.
Clue me in-what is D&J?
Liking your yard design.
Merle D.
Andy
Hi Merle. I remember you, and I see your name popping-up on Facebook too. We were referring to D&J Patio, who make the butterfly chair covers. Glad you like the design.
Pingback: making an entrance | fogmodern
Brooke
I still really like the combination of different coloured rocks next to each other, very sharp looking. You guys did such a great job!
Can I ask you a question about the rocks you used? I’m thinking of using 10mm (0.4″) pea gravel for a patio area (at a 1.75-2″ thickness) at the front of our house and I’m wondering how you’re finding walking on the 1/4″ grey rock you installed. Do you find that it shifts a lot when you walk on it? How thick did you go with your rock? For the pathway area I was thinking of switching to 40mm (1.6″) rock between 18″x18″ pavers so it doesn’t get kicked around as easily. What size of larger lighter coloured rock did you use with your plants? Thanks Andy&Karen!
Andy
Glad you like the combo, and thanks for the kind words! Guess we went about 2 inches with the small gray rock. It doesn’t shift much, though walking does disturb it a little. If you need it to stay in-place and be super-flat, you could use a compactor –we just compacted with our feet, in flip-flops! Works for us. Our neighbor has the same rock but much deeper, and that does show footprints quite prominently. Not that it looks bad, but probably wouldn’t work for you. So depth/compacting is key. You could also look at decomposed granite, though we have no direct experience of this. I know that requires compacting too. Our salt and pepper rock (if that’s what you mean) is 1 1/2 inches, and stays where you put it. We also used a larger version of the gray rock, maybe an inch but not sure, in the bamboo planter. The latter two are much more forgiving when blowing leaves/debris, whereas the small rock inevitably shifts a bit. Hope that helps. Do let us know if you have more questions.
Brooke
Thank you Andy! The info is very helpful. I’ve been a bit hesitant to try the smaller rock on the patio area but since we’re relatively shallow like yours (2″ max) it’s good to know it doesn’t shift too much. I can also picture you guys carefully stomping around in the flipflops! hehe Thanks again, I appreciate it!
Andy
You are so welcome, Brooke! Ah yes, the flip-flop image is amusing! Just recalled, we also placed a large piece of ply on top, then walked over that. I’m sure there are more reliable ways, but ours was kinda fun!
Pingback: paddling pool | fogmodern
Pingback: wet weekend | fogmodern
Angela
Love it ! What paint colors did you use on the exterior ? Well done !
Andy
Hi Angela! We are long gone now, as you may know (hence my delayed response). Anyway, paint colors are within this post: http://fogmodern.com/patio-paint/ – Pier by Behr for the siding and a custom mix for the beams.
tony ronneback
Hi Andy. Nice to see you are still getting some questions. It all looks great – you both did a grand job there.
Andy
Hi Tony! Yes, nice to get comments after all this time. And always nostalgic to look back. Thanks!