ready. set. strip.
Our paneling quest has resumed, prompted by another delivery. Ready Strip Pro is, apparently, amazing at removing multiple layers of paint. But, despite being described as “environmentally friendly” by the manufacturer, it does contain some harmful chemicals.

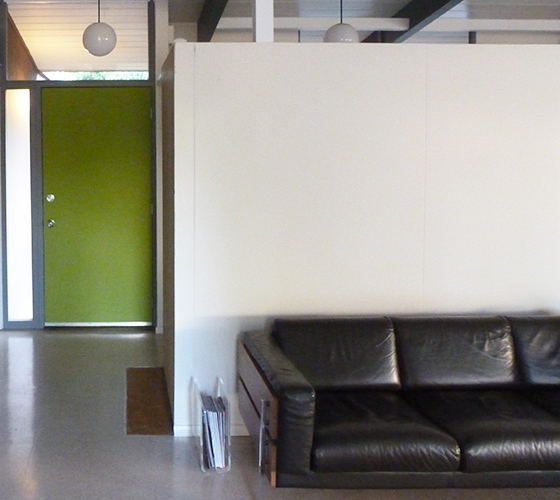
And it’s almost impossible to buy in California. We managed to get some shipped, and promised to be very careful with it. We’re using this on the three-quarter height wall between our kitchen and living room, which roughly matches the area covered by this gallon-sized tub.
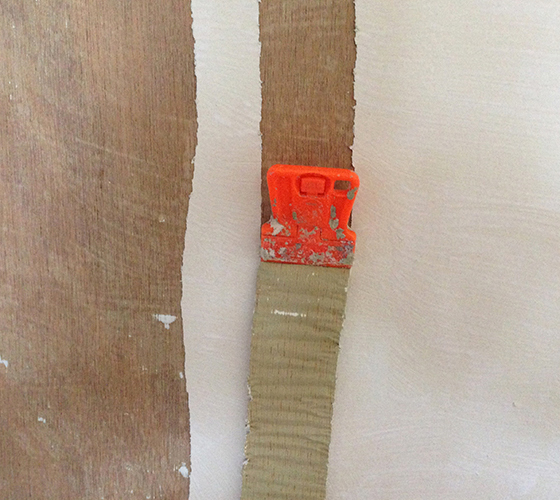
We brushed on the Ready Strip and left overnight. When it’s ready to remove, it turns an off-white color, which is helpful. I removed the paint in long strips, using my trusty razor. It’s a slow process, but oddly satisfying. Karen doesn’t have the patience for this, so it became my ‘thing’.
After lots of careful razoring, all that remained was some greenish primer/stain. We tackled this by hand-sanding the wall, paying particular attention to the problem areas. With the paneling looking pretty good, we paused, to tackle a related task.
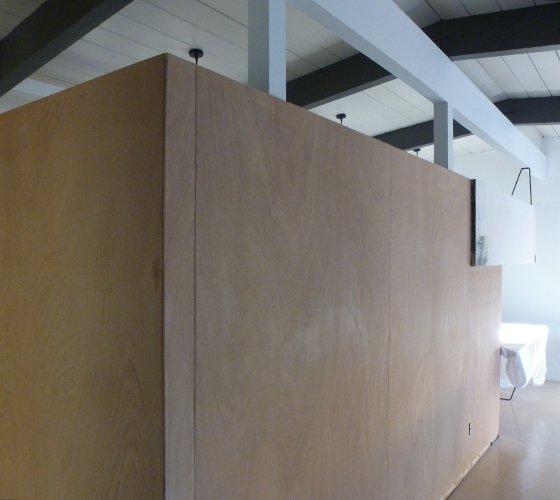
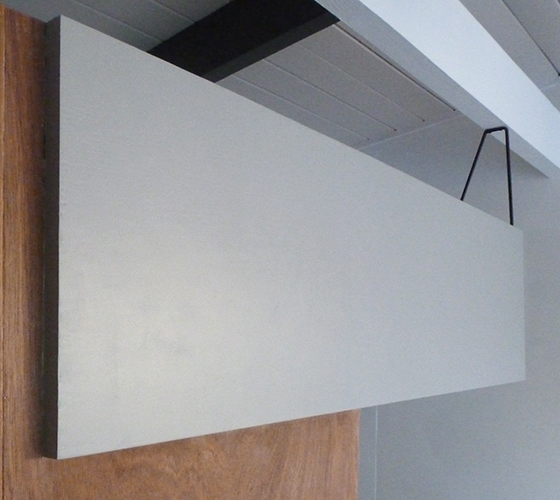
This is the so-called ‘flying coffin’ –a lengthy kitchen cabinet, suspended from the ceiling, and partly resting on the wall. We couldn’t decide whether it should blend or contrast with the paneling –early photos we’ve seen suggest the latter. Either way, first step was stripping it…
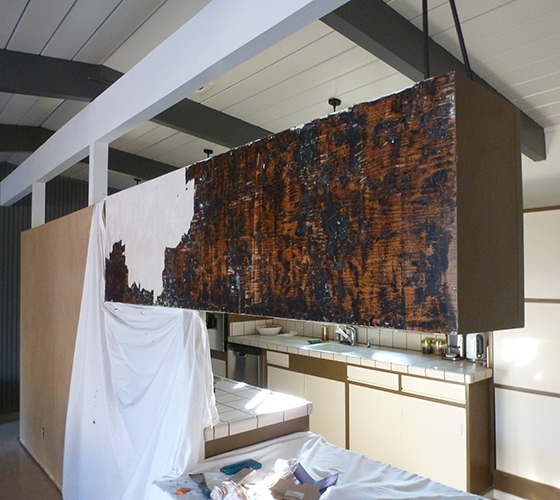
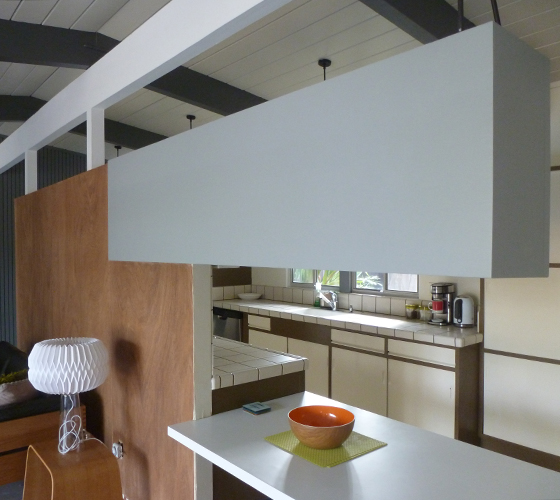
…which was every bit as horrible as it looks. It took several hours, over a couple nights. After all that, lots of sanding and filling, before we primed and painted with Sherwin Williams’ 7066 Gray Matters. Truthfully, it may need another coat, but it’s looking pretty good.
Eventually, we’ll paint all our kitchen cabinets to match, with the doors in contrasting high-gloss white. We’ll also be replacing that awful tiled countertop. But I digress. For now, we’re basking in the glory of having transformed just one of the cabinets. Anyway, back to the paneling…
…we finished it off by cleaning-up with mineral spirits, applying pre-stain conditioner, then using Restor-A-Finish (as per our office) to blend blemishes. Again we picked walnut, in a bid to mute the reddish wood tones. It turned out great, creating a rich, even finish.
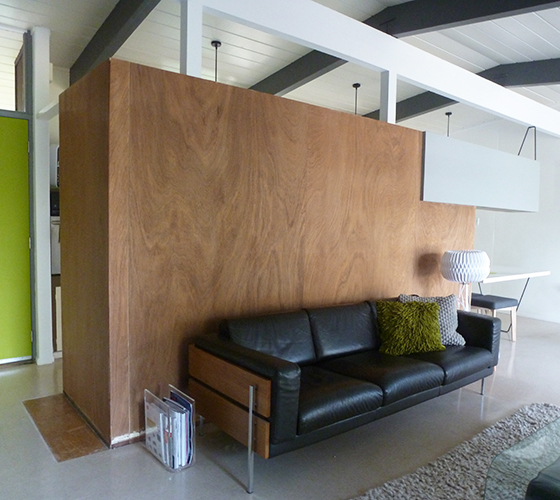
Now this wall is done, it gives the living area a much warmer feel. The rich wood paneling contrasts well with our white, gray, and green color palette. Now we just need to install new baseboards, to replicate the (long gone) originals, though that can wait until we replace the flooring.
Note: we subsequently removed all these panels, sanded and refinished.
Zann
AWESOME GUYS!!!! 🙂 <3
fogmodern
Glad you approve, Zann! Yet more paneling to reveal soon…
Jenny
Looking fantastic! Quite a labour of love, but so worth it!xx
fogmodern
Thanks mum! Getting there…gradually 🙂
redneckmodern
holy shit. that looks great… you guys got luuuucky with that one 😉 … too often painted panelling is toast.
fogmodern
Thanks Hunter! We have been lucky. I think it was poorly primed in the first place. We have now stripped three walls in total (office, living and master –post to come) and each has turned out better than the last.
Karolina
Wow! I never imagined stripping paint off of wood paneling was even possible in our house. Very tempted to try now. Where did you get the razor?
fogmodern
Razor/holder from Home Depot –very cheap. You don’t need that specific stripper either. We used Citristrip on our other walls. In fact, on the first wall we tried, the initial layers of paint peeled off without stripper. If you’re curious, you could just try peeling a small section with the razor, being careful not to dig into the surface of the wood. Once the paint is removed, the veneer is thick enough for a fairly thorough sanding.
Pingback: master plan « fogmodern
Dean
Looks great! I’m wondering if your “greenish primer/stain” indicates that the paneling originally had the grey wash as opposed to the oiled natural mahogany. Stripping that cabinet looks like a horror show! Eichler used an industrial coating called Zolatone on their cabinetry and closet doors so I can believe it would be pretty difficult to remove. Keep up the good work — it looks like it’s well worth the effort!
fogmodern
Ah yes, that could explain the paneling, Dean. I was aware they used Zolatone on the closet doors, but didn’t realize it was on cabinetry too. Either way, it was extremely difficult to remove. We got half way through and wished we hadn’t started. All good now though. Thanks for stopping by!
Pingback: 6489 s land park dr « fogmodern
Pingback: feature rich « fogmodern
Pingback: 6473 S Land Park Dr « fogmodern
Pingback: uncorked « fogmodern
Lisa and Kyle
Super Wow!
fogmodern
Yay! Thanks!