acrylic backsplash
After a false-start with flimsy Formica, we needed a more robust solution for our kitchen backsplash. We considered stacked white tile, but weren’t convinced. Instead, we revisited a material we’d used before, in England: acrylic. Looks like glass, but cheaper and easier to handle.
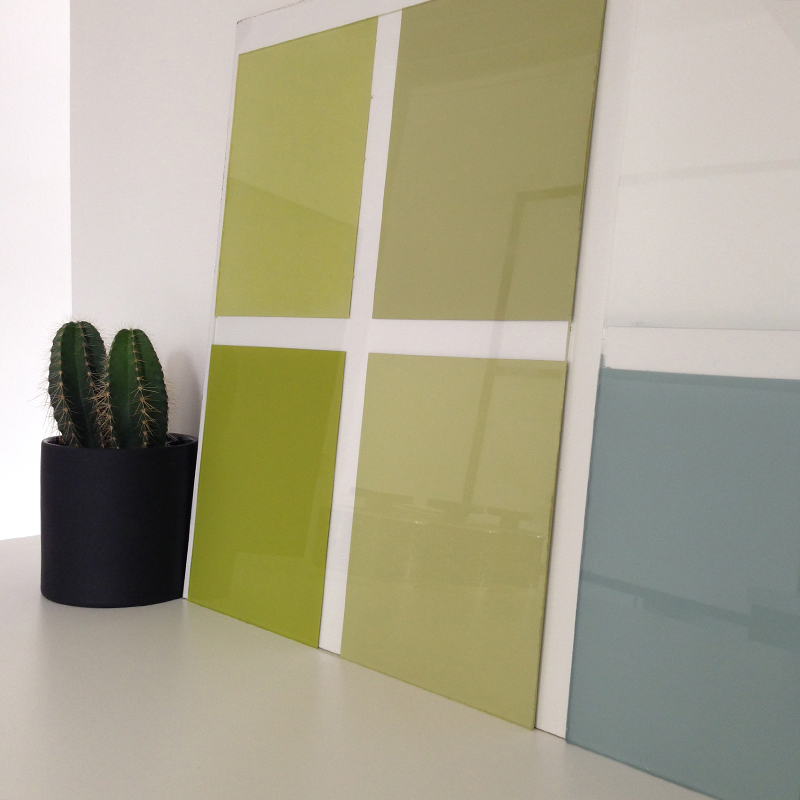
We’d be painting the reverse, so the finish is guaranteed. You can also pick any color –dangerous, with our record of indecision. We painted samples (muted greens and a grayish blue) and asked Instagram/Facebook friends for feedback. The verdict was clear…or rather blue.
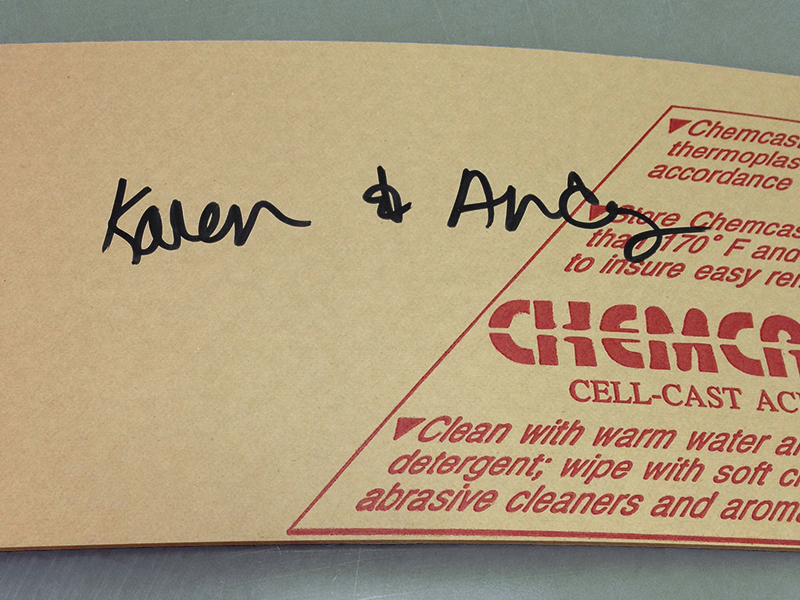
We measured-up and ordered at TAP Plastics –helpful guys, who even got our names right…though they seemed puzzled by our choice of backsplash material. We assured them we knew what we were doing. Back at the ranch, we cut holes for electrical outlets –drilling the corners, then connecting the dots.
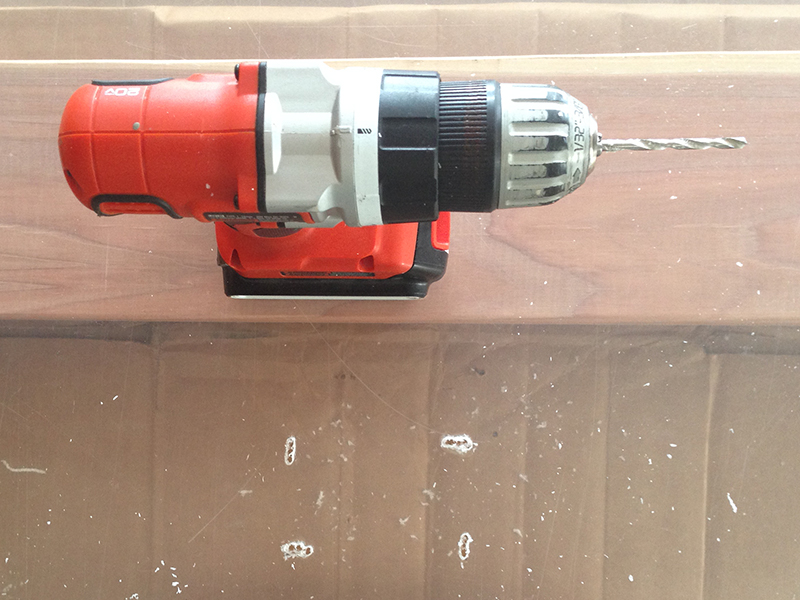
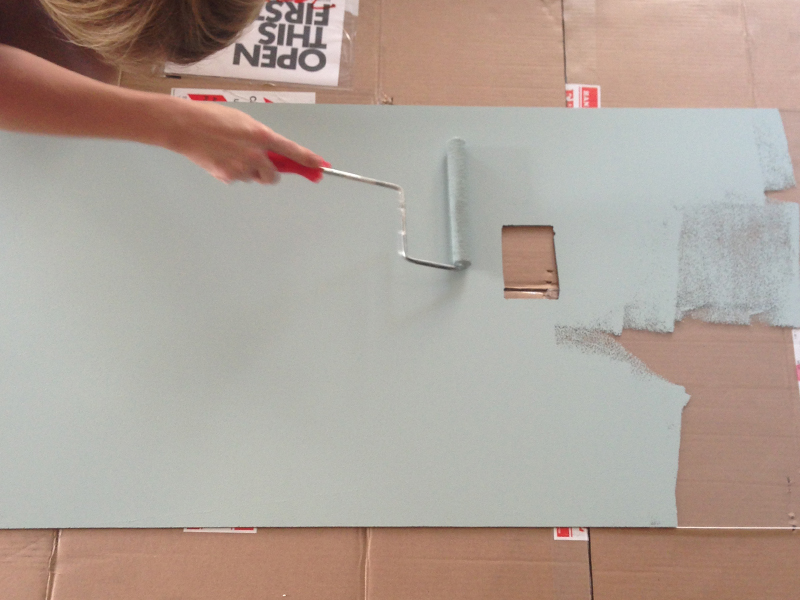
Important to do this before you paint, so you can see through the acrylic, to mark the holes –sounds obvious, but we almost forgot. Karen painted multiple coats, then we left to dry thoroughly. The blue came out just as we hoped. Be aware that colors appear slightly darker through the acrylic.
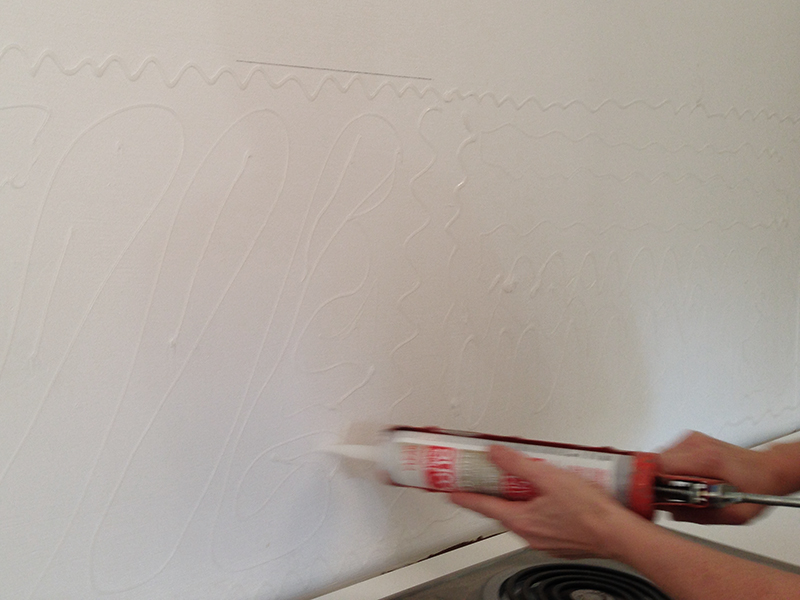
Next, we applied silicone to the wall –quickly, to allow maximum working time. Repetitive gun-squeezing is uncomfortable, so we took turns, until it was covered. This was Karen’s ‘go’ as I hastily snapped a blurry pic. You can see where we marked the top point in pencil, during a dry install.
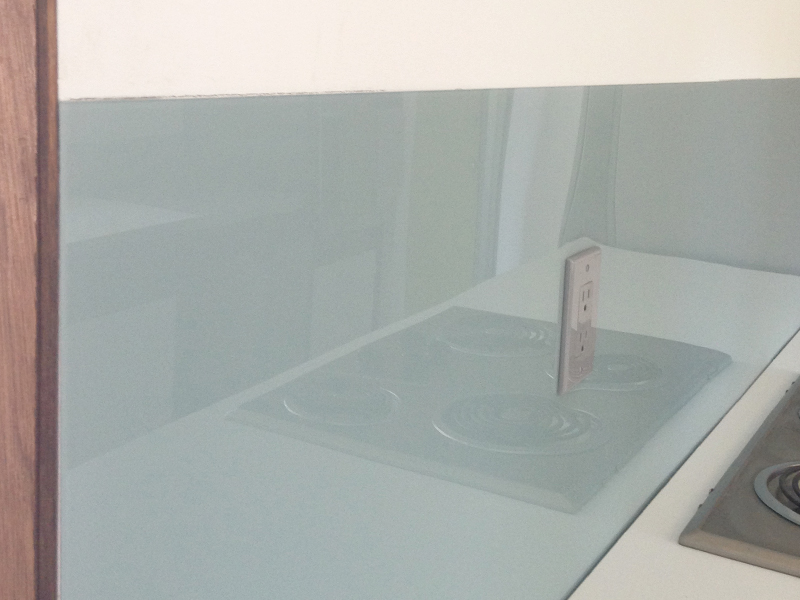
No pics of the next stage, as we both positioned the acrylic, smoothing to ensure adhesion. A nervous moment, as you don’t have much time to work with. Once in place, we added outlet covers and switch plates –we stuck with our original gray, as it complements the blue nicely…we think.

We caulked the top of the backsplash, and also where it meets the counter. We installed ours behind, so we could replace the counters later, but it could also be placed on top. Finally, we touched up the white paint to cover those pencil marks (still visible below).
We’d recommend painting the wall (behind) the same color as the backsplash. We lost the tiniest (almost undetectable) speck of paint during install, and you can just make out some white, if you know where to look –painting the wall matching blue would have prevented this.
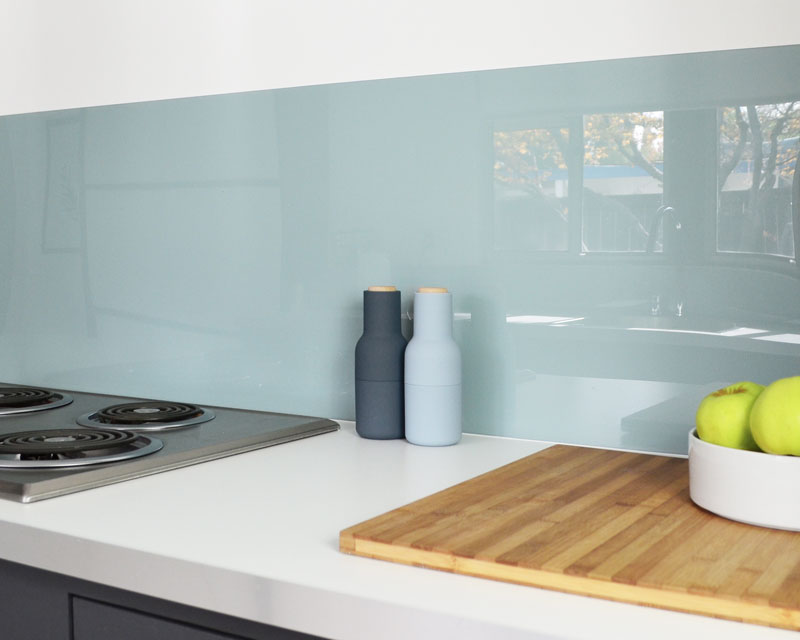
But we’re very happy. We love the color, the reflection, the smooth texture, and the ease of cleaning. We’ve lived with this for about a month, and it’s still like new. We realize the wall above it looks a little blank –we’re adding shelving (plus color-coordinated knick-knacks) later this week.
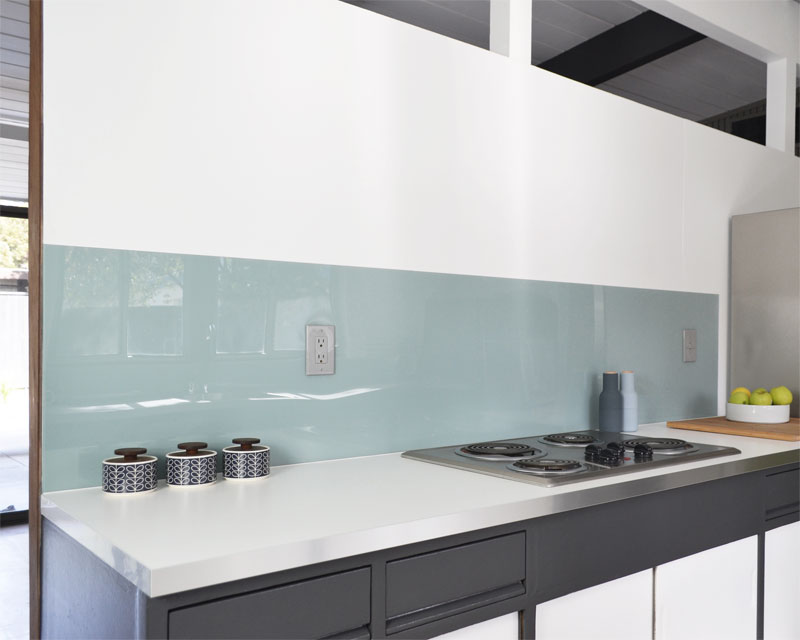
You’ll probably notice we painted the cabinets, in our dark gray beam color –they used to be a wishy-washy light gray. We like this much better. We’ve also made some functional improvements, including smarter internal storage. More on all that coming soon…
Julie
It looks fantastic! And we’re planning for a countertop / backsplash redo ourselves soon.
What kind of countertops did you install? They also look great.
fogmodern
Thanks Julie –glad you like the look. The countertops were an opportunistic buy –$10 each from IKEA’s “as is” section! They were never meant to be a permanent solution, but we do like them. Only issue is they are eight feet long, and we needed ten on one side. We infilled with a section, but it bugs us (me, in particular). Otherwise, we’d probably keep them long term. Good luck with your kitchen project!
Brooke
The backsplash looks great! I like the colour choice and it looks great with the darker cabinets.
We used Ikea Countertops as well as a temp fix and ended up with 2 seams on the same run. We ended up buying 2 extra large bamboo cutting boards from Ikea and we leave them over the seams to hide them slightly. We lucked out that the 2 spots we have the cutting boards are the 2 spots we prep food in the most so they don’t look too out of place.
fogmodern
Hey Brooke! Thanks, glad you like. Along the same lines, we did consider inserting a butcher block where the seam is (on the opposite side to above). But that would be above the dishwasher, and not where we (well, I) do prep. Also, having priced it up, we decided it would just be better to wait, and replace the counters.
Julie
What thickness of acrylic did you end up buying? How was the delivery process with pieces that large?
fogmodern
It was 1/8″. We borrowed a neighbor’s truck and picked it up ourselves. One 8′ length (pictured) and a narrower strip (for the opposite side) at 10′. Pretty bendy at that length, so not too tricky to handle.
Lambie
How does this hold with scratches? Is it durable that way? I love the way it looks. I am looking for an affordable DIY backsplash. This is fantastic!
Andy
Hi Lambie. Well, we only lived with this backsplash for a couple of years but didn’t cause a single scratch. So I don’t believe it marks or scratches easily. It is certainly affordable and easy to work with. Hope that helps.
anya
What did you use to cut the holes for the outlets?
Andy
Hi Anya. We drilled holes in the four corners then (from memory) used a small fine jab saw to connect them. Hope that helps. Andy.
Frank
Looks great ! my only concern is does your wall have to be perfectly straight ?
Andy
Thanks Frank! You mean flat? If so, the flexibility of acrylic makes it a little more forgiving than rigid materials. In theory, it would even work on a curved wall.
tony
It looks amazing –very smart and stylish. Where we live there are only seven days in a week. Where you live there must be more! Very well done. Looking forward to the next episode.
fogmodern
Thanks Tony, you’re too kind! It does feel like we spend all our time working, though. We really should get out more! Another “episode” coming soon…
Karolina
Oh, I like. It adds a subtle bling to your kitchen… Very nicely done. And the darker gray looks perfect.
fogmodern
Hey Karolina! Pleased you like the changes. I’m liking the term “subtle bling” –I’ll have to use that. Yeah, I much prefer this gray. Can’t believe we didn’t pick it from the start…but at least we got there eventually.
John
Still think the magazine Atomic Ranch would be interested in doing an article on your place. They just posted a picture of my living room in their Winter edition on the Home Page on page 12.
fogmodern
Hi John. One day, our home may grace the pages of AR –we do speak to those guys occasionally. Our home looks good if you point the camera at the right spot, but we’re far from finished or article-ready. Cool that your living room featured –will take a look when our copy arrives.
Wendy
Your kitchen looks great now and I love the backsplash. After you drilled the holes did you use a jigsaw to cut out for the outlets? Also did you use water based paint? I think we will try this in our daughter’s new kitchen. Thanks for all your info – great even though we don’t have an Eichler!
fogmodern
Thanks Wendy, pleased you like it. We just used a fine-blade hacksaw between the holes -we were worried about cracking, so preferred something slow and manual. The paint is Behr premium plus ultra (our go-to). Cool that you’re considering doing this. Let us know if you have further questions. And you are welcome! Thanks for following along.
Nicole Alleyne
Is this a water based or an oil paint
fogmodern
Hi Nicole. We used Behr Premium Plus Ultra, a water-based paint which includes primer. I don’t believe paint type is crucial.
Julia
there were a lot of options for acryilic on the TAP website – which one dd you use – kind, thickness, width, edges etc?
fogmodern
Hi Julia. The edges were unfinished (we caulked those) and the thickness was 1/8″. I can’t recall the exact type, sorry. We went into the store and explained the application. I recall that our choices were limited, on account of needing a continuous 10 foot piece. We provided all the dimensions and our sheets were prepared for us.
Steve
At the risk of betraying myself as a complete copycat (I haven’t had an original thought in years), do you remember the specific blue-gray Behr Premium Plus Ultra color you used for the backsplash? It looks awesome.
Also, any concern about splashback/heat from your cooktop damaging the acrylic? I’m thinking of putting in a stainless steel section over the cooktop for that reason.
Thanks as always for the inspiration!
fogmodern
Ha! Thanks for the laugh, Steve! I can’t help you with color though –Karen mixed this one. There are similar-looking standard Behr options. Do bear in mind that the color is diluted when behind the acrylic –this started off much brighter.
We have an electric stove top (so minimal residual heat) and will eventually install induction. So the residual heat is minimal currently. Might be different with a gas top. You can get heat-resistant acrylic if that’s the case. Failing that, the stainless section is a good solution.
Happy we could provide some inspiration! Please let us know how you get on.
Steve
Much appreciated. Thank you!
Lisa and Kyle
Neato! Looks way better than our glass tiles! 🙂 Very continuous, and consistent. Great job!
fogmodern
Thanks! It was a budget solution, but we wouldn’t change a thing. I guess glass itself would be better, but so much more difficult to handle. And we’d never have been able to install ourselves/do cutouts. Works for us!
Pernille Hass
I did this a while back. I’m wondering if you can see the sillicone behind the acrylic? It is very noticeable on mine and drives me crazy, but I would have to remove the walls to get the acrylic off because of all the sillicone!
Andy
Did you back paint it, or is it colored acrylic? We completed a similar project in the UK, with white acrylic, and didn’t back paint it. Sure enough, the silicone showed through, especially in the light. This time, we back painted, giving it a couple of coats. You can’t see a thing, even with light shined on it.
Pernille Hass
Yes- I back painted it and made sure to use neutral cure silicone. It’s very strange. Maybe it’s the paint:(
Andy
Hmmm…that IS strange. Maybe it is the paint. Sorry to hear it hasn’t quite worked out for you.
Pingback: DIY Kitchen Backsplash Ideas
Pingback: Not Your Basic Backsplash: A Lovely, Low-Maintenance Alternative to Tile – Pioneers Discovers
Pingback: Need a Change? You'll Love This Low-Maintenance Alternative to Tile Backsplash. — Apartment Therapy | Caribbean Blogz
Deirdre McQuade
Interesting post, thank you! You noted that acrylic scratches more readily than glass. What precautions do you take, if any, to protect it when cleaning, etc? Thanks in advance!
Deirdre McQuade
Sorry — Just realized that Apartment Therapy noted the “scratchability”! 😉
Andy
Hi Deirdre. Yes, it was mentioned on/by Apartment Therapy. We have honestly had zero issues with scratching. The surface cleans so easily, without using anything abrasive. Acrylic clearly isn’t as durable as glass, but it hasn’t deteriorated at all since install.
Emily
I am thinking about doing a glass backsplash in our upcoming kitchen renovation. I fell in love with the glass install over the wallpaper Sunset did in their idea house or some such things recently. I really like the idea of doing acrylic because we could do it ourselves and because our gas range sits on a peninsula, so it isn’t even close the backsplash. I saw in your recent comment that you were still loving it, just wondering if you have any other thoughts of ideas on it a few years post install?
Andy
Hi Emily! Glass over wallpaper is interesting, though the backsplash would need to be fixed to the wall in a different way. Sounds like acrylic would work for you guys, without any heat issues. We are still loving ours, for sure. So low maintenance, and no problems whatsoever. There’s honestly nothing we’d do differently for this install. Feel free to ask further questions.
Anthony
Do you remember what sheen you used? Flat, satin, semi-gloss, or gloss? Thanks!
Andy
Hi Anthony. We used matte. The sheen has no effect with back-painting, as the finish you see is the acrylic or glass.
Anthony
Thank you!
Carl
Hi. Thinking of doing this to our remodel project. Thank you for sharing. How is the acrylic holding up now that its been a few years?
Andy
Hi Carl. It’s holding up great! Looks like the day we installed it. Or it did when we left –we just moved back to England, a month back.
Vin
We have painted our walls. Is the effect of putting the clear acrylic over the painted wall the same as back painting?
Andy
Hi Vin. The effect should be much the same, although the density of color would likely be greater if also painted into the reverse.
Victoria
Beautiful! Great instructions. We’re wanting to do a wall that is 106 inches. Most places online, including TAP, look like the longest panels come in 96”. Even the Cut to size options. Your panel looks longer. Did you custom order it? I’m trying to see if this is even an option for 106”. Thanks!
Andy
Hi Victoria. Glad you like it! From memory (we’ve since moved) the main panel (cooktop wall) was 96 inches. That said, the opposite side was 10 feet and I don’t recall having to special order it. Hope this works out for you.
Alan Chapman
Fantastic and lovely design of glass kitchen Splashbacks! I really like it so much. Thanks for this great article. Cheers!
Andy
Hey Alan! Glad you like the splashback. And you are welcome – thanks for stopping by!
Laura Margolis
This is wonderful! Perhaps a silly question but do you think this would work/hold up for shower walls?
Andy
No silly questions here, Laura! I don’t see why it wouldn’t work as a top layer, providing the edges were sealed.
Andi Enyiema
Hello, just stumbled unto this page and I’m a new fan. What’s the thickness of the acrylic you used? Thanks.
Andy
Hi Andi and sorry for my delayed reply. We are no longer in our Eichler and I honestly don’t recall the thickness. Very thin though and thickness doesn’t really have an effect on the quality of the finish. Oh, and thanks for stopping by!
Pingback: 10 DIY Kitchen Backsplash Ideas • DIY Home Decor
Sandra shearer
Hi really like the idea of your splashback .
I live in the UK and I am going to try it in my kitchen . What brand of paint would you recommend? I would love to do it in a copper colour but I’m not sure if it would turn out ok . Look forward of hearing from you thanks very much
Andy
Hi Sandra – sorry for the delay. Busy with my day job these days, also now living in the UK. Anyway, to your question, I would say that paint brand isn’t too crucial. Anything reputable will do, provided the coverage is good and consistent. Copper sounds interesting and should work. Whichever way you go, I strongly recommend painting one or two colours on a test piece first. Good luck!
Pingback: Acrylic Backsplash | kinosed
Marijke
Thanks for the tips as I too want Acrylic as a backsplash. I don’t know how people can stand to clean the food out of the grout.. We used cheap Ikea countertops too and then had them wrapped in stainless steel.
Andy
You are welcome, Marijke! I know – tiles in a kitchen just don’t work! Good luck with it.
Maggie
Hi there! This has inspired us to do a similar backsplash in our RV kitchen!
Just to maybe help others — we bought black acrylic panels from TAP Plastics (same company as in this blog post) to put on our RV fridge doors. We bought the regular acrylic and it does scratch very easily, even just wiping it with a dish towel — so we clean it with a vinegar water spray and a squeegee, or I’ve also used lens cleaner fluid and a microfiber lens cloth.
TAP does offer Abrasion Resistant (AR) acrylic and I’m guessing that’s what was used in this project since you had no issues with scratches. The AR is a bit more expensive.
Also, TAP customer service is great about answering questions via email.
I actually went with the regular acrylic again, not the AR, for my backsplash project since it’s much cheaper and I now know how to clean it safely. Also we aren’t permanently attaching it (we’ll either use double sided tape or a thin layer of silicone just around the edges…my pieces are small and super lightweight) so if there are issues with it or it gets scratched by accident it shouldn’t be too difficult to replace.
Hope that might help someone else!
Cheers!
Bec P
Thank you, Maggie! I’m looking to put acrylic in my bathroom as the backsplash at the sinks, and you answered some lingering questions I had.
Cynthia
Thank you!! I am
Doing this in my kitchen, but wondered about using dbl sided tape instead of caulk. How does it look? Can you see the tape? Thanks in advance!
Sandra Changuion
This is awesome! Is the wall behind your backsplash a stucco or wall or drywall?
Andy
Hi Sandra! Sorry for the delay and so pleased you like the backsplash! The wall is actually neither – it’s the original 3/4 size wood-panelling wall that divides the kitchen from the main living area. Panelling had already been painted throughout – we restored other walls but decided to repaint this one. Thanks for reading!
Mona
What n where do u buy the acrylic sheets
Andy
Hi Mona. We bought the sheets from our local Tap Plastics store: https://www.tapplastics.com/
Bob
Love what the backspashes do for your kitchen! Tell us about the electrical part of the project. Did you use spacers to raise the switch and outlet to the acrylic surface?
Andy
Hi Bob. Glad you like the backsplash. The acrylic is pretty thin so no spacers needed at all. Thanks for stopping by.
Kamma Scott
I love this so much, and have used acrylic in the past. I am wondering about the use of this behind the range…is the heat an issue at all? Thought you needed fireproof material behind that??
Andy
Hi Kamma. Glad you like it! Acrylic should hold-up fine, provided no direct flame is applied. That said, we had an induction cooktop – minimal heat given off versus gas. We’ve since moved back to the UK but had zero heat issues for the couple of years we used it.
Laurent Long
Hi,
I cannot say from the picture but through the acrylic sheet, are there any visible marks after painting?
Thanks,
Andy
Hi Laurent. No marks at all. Just ensure you have total coverage and the finish will be seamless.
Pingback: 18 Kitchen Backsplash Ideas That Go Right Over Old Tile! • The Budget Decorator
Pingback: 18 Kitchen Backsplash Ideas That Go Right Over Old Tile! • The Budget Decorator - New Save Money
Nicolette
HI! do you have an updated photo since the shelving was put up? would love to see the finished product. thanks
Pingback: 18 Kitchen Backsplash Ideas That Go Right Over Old Tile! • The Budget Decorator – TheBudgetDecorator.org
Pingback: Can I Use Black Plexiglass As A Kitchen Backsplash? Pros And Cons
Joy
I love the look of the acrylic and would love to try it. Just curious about the cost. Is it cheaper than tile?
Andy
Hi Joy. We moved back to the UK in 2017 so I’m struggling to recall the cost. It is cheap. And almost certainly cheaper than tile. But we didn’t choose it for the cost, just as an easier-to-handle alternative to glass. Hope that helps! Andy
Pingback: 33 Ideas to Cover Up or Update Kitchen Backsplash Tiles - Simplify Kitchen Co